Fortunately, DYMO has made it easy for us since they provide easy access to their SDK which has a number of well documented examples on how to implement DYMO label printing directly from your own application (or in this case Javascript).
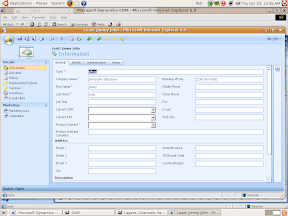
For this basic example, were going to encapsulate our code inside of a button located on a the contact form.
The Button code that goes inside of the contact section in ISV Config customizations:
<Button Icon="/_imgs/ico/print_ico.gif" JavaScript="<JSCRIPT CODE GOES HERE>" Client="Web, Outlook" AvailableOffline="false">
   <Titles>
      <Title LCID="1033" Text="Print Label" />
   </Titles>
   <ToolTips>
      <ToolTip LCID="1033" Text="Prints Dymo" />
   </ToolTips>
</Button>
The Javascript to print the label:
// Initializes the basic required variables
var texttocopy = '';
var DymoAddIn, DymoLabel;

// The following commented line prompts the user to add additional information to a label. This is useful if you design a custom label that requires the user to insert a special code
// var taginfo = prompt('Type of Label?', '');

// Set up the DymoAddIn object. This is the master object that actually prints the label
DymoAddIn = new ActiveXObject('DYMO.DymoAddIn');
// Label object where the label information is actually stored and passed to the dymo activex control
DymoLabel = new ActiveXObject('DYMO.DymoLabels');

// Set the taginfo field to blank if it's null. Used if you are using a special code for a label
// if(taginfo == null) { taginfo = ''; }

try
{
   // Add Company variable to texttocopy field if it exists and give it a newline
   if (crmForm.all.companyname.DataValue != null)
   {
      texttocopy += crmForm.all.companyname.DataValue + '\n';
   }

   // Add Firstname variable to texttocopy...
   if (crmForm.all.firstname.DataValue != null)
   {
      texttocopy += crmForm.all.firstname.DataValue + ' ';
   }
   // Add Lastname  variable to texttocopy...
   if (crmForm.all.lastname.DataValue != null)
   {
      texttocopy += crmForm.all.lastname.DataValue + '\n';
   }
   // If no Lastname then just a carraige return
   else
   {
      texttocopy += '\n';
   }

   // Lets check the various required address fields to make sure they exist
   if (crmForm.all.address1_line1.DataValue != null && crmForm.all.address1_city.DataValue != null && crmForm.all.address1_stateorprovince.DataValue != null && crmForm.all.address1_postalcode.DataValue != null)
   {
      texttocopy += crmForm.all.address1_line1.DataValue + '\n';
      // Address 2 isn't always used to lets make sure it exists
      if (crmForm.all.address1_line2.DataValue != null)
      {
         texttocopy += crmForm.all.address1_line2.DataValue + '\n';
      }
      // Add in the rest of the addresses
      texttocopy += crmForm.all.address1_city.DataValue + ', ' + crmForm.all.address1_stateorprovince.DataValue + '  '  + crmForm.all.address1_postalcode.DataValue + '\n';
   }

   // The dymo label software installs the label files into one of several locations. Use the label that corresponds to the type of label you are printing.
   if(DymoAddIn.Open('C:\\Documents and Settings\\All Users\\Documents\\DYMO Label\\Label Files\\LABEL.LWL'))
   {
      // Set the address to actual DymoLabel Object
      DymoLabel.SetAddress(1, texttocopy);
      // Insert custom text into a label
      // DymoLabel.SetField('INFOFIELD', taginfo);
      // Print the label
      DymoAddIn.Print(1, true);
   }
   // Default location of label file for older installations
   else if (DymoAddIn.Open('C:\\Program Files\\DYMO Label\\Label Files\\LABEL.LWL'))
   {
      DymoLabel.SetAddress(1, texttocopy);
      // Insert custom text into a label
      // DymoLabel.SetField('INFOFIELD', taginfo);
      DymoAddIn.Print(1, true);
   }
   // Vista
   else if (DymoAddIn.Open('C:\\Users\\Public\\Documents\\DYMO Label\\Label Files\\LABEL.LWL'))
   {
      DymoLabel.SetAddress(1, texttocopy);
      // Insert custom text into a label
      // DymoLabel.SetField('INFOFIELD', taginfo);
      DymoAddIn.Print(1, true);
   }
   else
   {
      alert('Error: Label file Not Found!');
   }
}
catch(e)
{
   alert(e + ': ' + e.description);
}
For this to work, the dymo label software needs to be installed on any workstation that needs to use this customizations with a dymo printer properly configured.

